“Discover Sentry Cron: The Next Generation Tool for Effective Cron Job Monitoring and…
“Discover Sentry Cron: The Next Generation Tool for Effective Cron Job Monitoring and Troubleshooting”

Cron jobs are crucial for maintaining and automating a variety of server- and application-related duties. Effective monitoring and control are required as their complexity and frequency rise. Cron job monitoring issues can cause duties to be missed or completed incorrectly, which will negatively affect the usability and performance of your application. Sentry, a well-known platform for error tracking and monitoring, has unveiled Sentry Cron, a brand-new tool that is presently in beta and intends to completely change how you track and troubleshoot your cron jobs. In this piece, we’ll delve into the world of Sentry Cron, examine its features, and explain how it can revolutionize the way you manage cron jobs.
What is Sentry Cron?
Sentry Cron is a cutting-edge monitoring and troubleshooting utility created especially for controlling and monitoring the effectiveness of cron jobs. It is based on the well-known Sentry platform and gives administrators and developers real-time insights into their scheduled tasks, making it simpler to find and fix problems before they have an effect on the application or server.
Sentry Cron records important details about every cron task execution, including runtimes, success rates, and errors. Users can receive notifications of any problems or anomalies that may need attention thanks to its sophisticated alerting system. Additionally, the tool provides a straightforward dashboard where users can view the data and assess the effectiveness of their cron tasks over time.
Setting up Sentry Cron involves several steps to integrate it with your cron jobs and configure the necessary settings. Here’s a step-by-step guide to help you get started:
- Create a Sentry account (if you don’t have one already): To use Sentry Cron, you will need a Sentry account. Visit the Sentry website (https://sentry.io) and sign up for a new account or log in to your existing one.
- Create a new project: Once logged in to Sentry, create a new project by clicking on the “Create Project” button. Choose the appropriate platform (e.g., Node.js, Python, etc.) and give your project a name.
- Get your Sentry DSN: After creating the project, you will be provided with a Data Source Name (DSN), which is a unique identifier for your project. You will use this DSN to configure Sentry Cron in your application. Copy the DSN and save it for later use.
- Install the Sentry SDK: In your application, install the Sentry SDK for your platform. For example, if you are using Node.js, you can install the SDK using the following command:
yarn add @sentry/node
5. Initialize Sentry in your application: Import the Sentry SDK in your application and initialize it using your Sentry DSN. For example, in a Node.js application, you would add the following code:
const Sentry = require('@sentry/node');
Sentry.init({
dsn: 'YOUR_SENTRY_DSN',
});
Replace YOUR_SENTRY_DSN with the DSN you copied earlier.
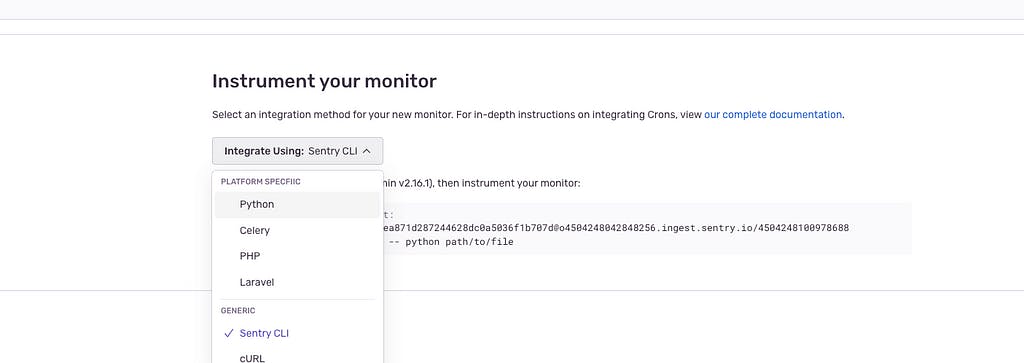
6. Configure Sentry Cron integration: To integrate Sentry Cron into your cron jobs, you will need to make API calls to Sentry at the beginning, during, and end of your cron job execution.

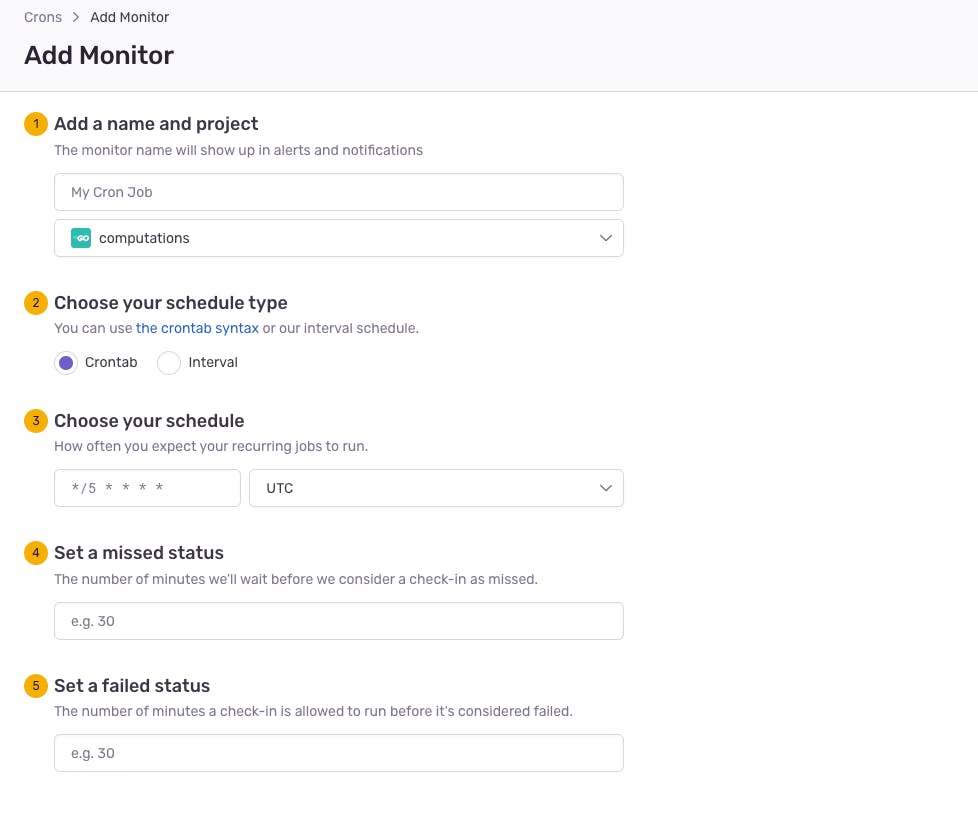
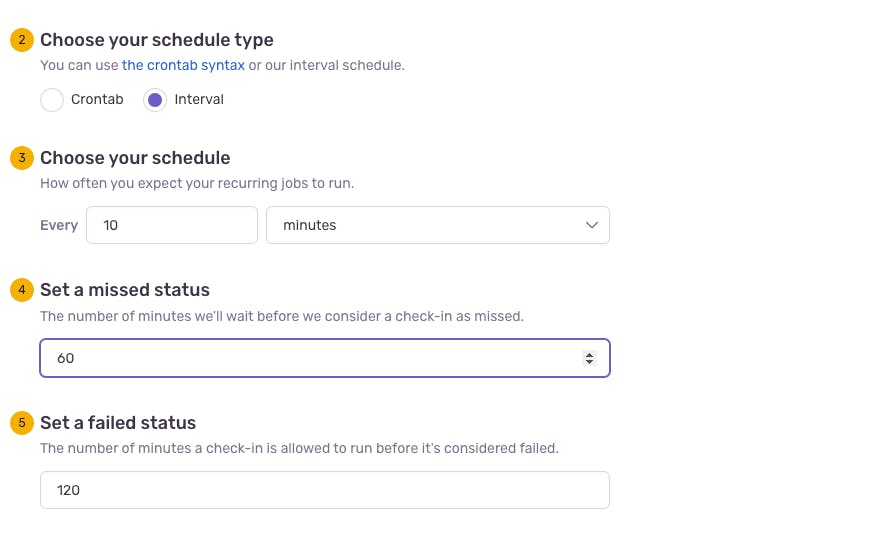
fill in the form the way you want it
Then choose how you to use it
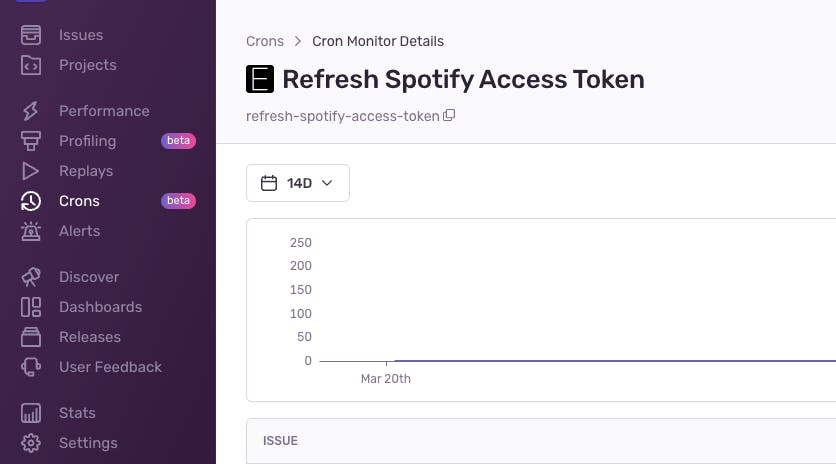
Look at this beautiful graph
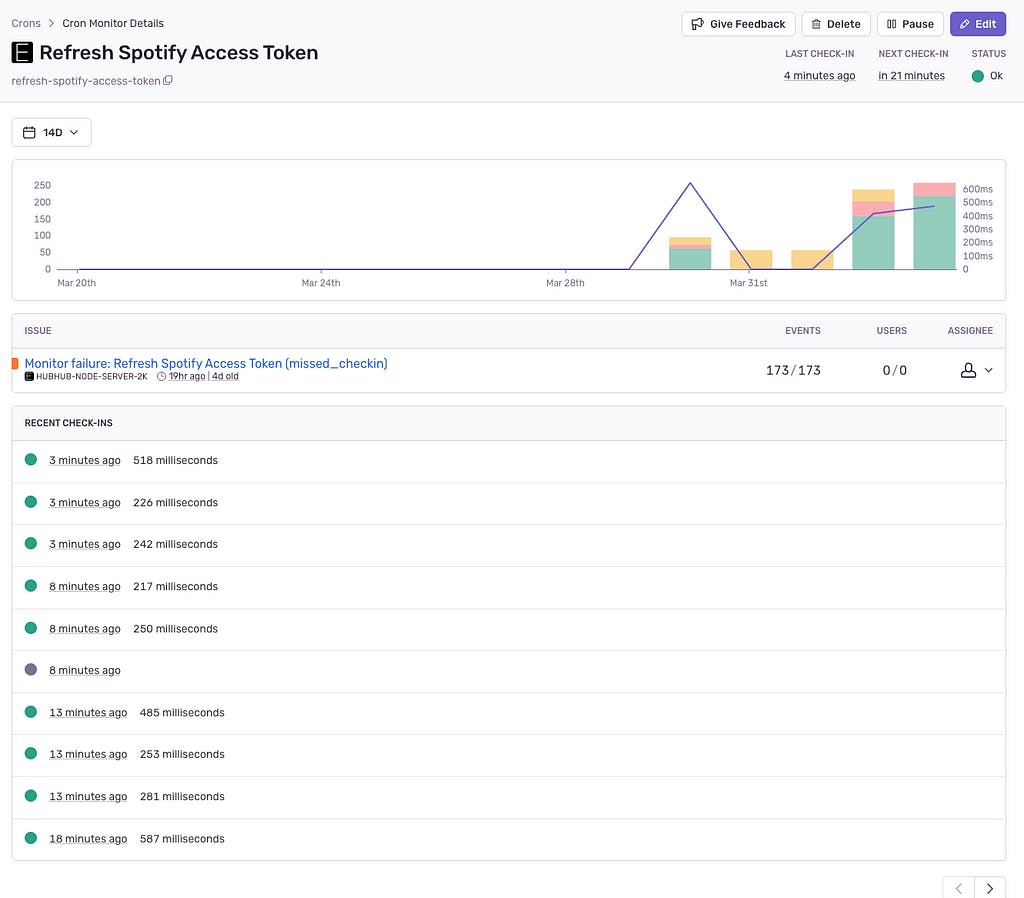
7. Set up alerts (optional): You can set up alerts in Sentry to notify you of any issues or anomalies in your cron jobs. To do this, navigate to the “Alerts” tab in your Sentry project, and create a new alert rule based on your preferred conditions (e.g., if a job fails, if an error occurs, etc.).
8. Test your integration: After setting up Sentry Cron, test your cron job to ensure that Sentry is receiving the data correctly. You can do this by manually triggering your cron job or waiting for it to run at its scheduled time. Once the job has run, check your Sentry dashboard to confirm that the job’s data is being displayed as expected.
How we are using Sentry Cron at ProPro Productions
function scheduleTokenRefresh() {
console.log('Scheduling token refresh');
// Schedule the task to run every 20 minutes
cron.schedule('*/5 * * * *', async () => {
console.log('Refreshing all expired Spotify tokens');
try {
// Notify Sentry the job is running
await axios.post(
'sentry.io/api/0/organizations/your_org/moni..,
{ status: 'in_progress' },
{
headers: {
'Content-Type': 'application/json',
Authorization:
'DSN Your_DSN',
},
},
);
await auth.refreshAllExpiredTokens();
Sentry.captureMessage('Finished refreshing expired Spotify tokens');
console.log('Finished refreshing expired Spotify tokens');
// Notify Sentry the job has completed successfully
await axios.put(
'sentry.io/api/0/organizations/your_org/moni..,
{ status: 'ok' },
{
headers: {
'Content-Type': 'application/json',
Authorization:
'DSN YOUR_DSN',
},
},
);
} catch (error) {
Sentry.captureException(error);
console.error(
`Error refreshing expired Spotify tokens: ${error.message}`,
);
// Notify Sentry the job has failed
await axios.put(
'sentry.io/api/0/organizations/your_org/moni..,
{ status: 'error' },
{
headers: {
'Content-Type': 'application/json',
Authorization:
'DSN Your_DSN',
},
},
);
}
});
}
In this illustration, Sentry Cron is being used to keep an eye on a cron task in charge of refreshing Spotify tokens that have expired. The scheduleTokenRefresh function shows how Sentry Cron is integrated at different stages of the task by setting up a cron job to run every 5 minutes.
Here is how the method is broken down:
- The token refresh task is scheduled to execute every 5 minutes using the cron.schedule function, as indicated by the cron expression */5 * * * *. An asynchronous arrow function is used to enclose the job.
cron.schedule('*/5 * * * *', async () => {
// ...
});
2. Sentry Cron is informed of the job’s state by the code, which makes use of the Sentry API. To start, a POST request is sent to signal that the task is active. A PUT request is made to change the job’s state from “ok” (successful) to “error” after the task has been completed, either successfully or unsuccessfully. (failed).
// Job is in progress
await axios.post(/*...*/, { status: 'in_progress' }, /*...*/);
// Job is successful
await axios.put(/*...*/, { status: 'ok' }, /*...*/);
// Job has failed
await axios.put(/*...*/, { status: 'error' }, /*...*/);
3. Executing the task: The auth.refreshAllExpiredTokens function is called to refresh all expired Spotify tokens. If the task is successful, a message is captured in Sentry using Sentry.captureMessage, indicating that the tokens have been refreshed successfully.
await auth.refreshAllExpiredTokens();
Sentry.captureMessage('Finished refreshing expired Spotify tokens');
console.log('Finished refreshing expired Spotify tokens');
4. Handling errors: If an error occurs during the execution of the task, it is captured using Sentry.captureException, and an error message is logged to the console.
Sentry.captureException(error);
console.error(`Error refreshing expired Spotify tokens: ${error.message}`);
This integration of Sentry Cron enables effective monitoring of the cron task for refreshing expired Spotify tokens as well as fast detection and resolution of any problems.


